Several weeks ago, I did a talk on building Windows Runtime components in C++. As part of that talk, I did a demo that showed accessing a WinRT component written in C++ from a C# XAML application. Like I did for my //build talk, I’ve written this walkthrough so you can follow along at home without having to read code off the recorded video stream. I’ve also published the source up on GitHub.
The demo had two parts – the first was a “Hello, world!” style demo, the second demonstrated wrapping an existing C++ library in a WinRT component to make it callable from other languages. This post covers the first part of the demo. I’ll post a walkthrough of the second part of the demo soon.
In order to follow along, you’ll need the Windows 8 Release Preview as well as Visual Studio 2012 Express RC for Windows 8. You should be able to use the RC version of VS 2012 Pro, Premium or Ultimate, but I’ve only tested with Express. Note, the original presentation was done on Win8 Consumer Preview / VS 11 Beta, but I figured it made more sense to write up the walkthrough on the latest bits.
We’re going to start by creating the C# XAML app we’ll use as the component client. Fire up VS 2012 RC and select new project. Select Visual C# -> Windows Metro Style -> Blank App (XAML), name the project “WindowsCamp” and press OK. Once the project has been created, open up the MainPage.xaml file, replace the Grid element that’s there by default with the following XAML code:
<StackPanel Background="{StaticResource ApplicationPageBackgroundThemeBrush}">
    <Button Click="Button_Click_1">Click me</Button>
    <TextBlock x:Name="myText" FontSize="20"></TextBlock>
    <Image x:Name="myImage"></Image>
</StackPanel>
As you can see, my UX skills have not improved since //build.
Now, we need to add a project for the C++ WinRT component. Right click on solution in the Solution Explorer and select Add -> New Project. In the New Project dialog, Select Visual C++ -> Windows Metro Style -> Windows Runtime Component, name the project “WindowsCampComponent” and press OK.
Once the component project has been created, we’re going to add some code to it. Open Class1.h if it’s not already open. Update the file to read as follows:
#pragma once

using namespace Platform;

namespace WindowsCampComponent
{
    public ref class Class1 sealed
    {
    public:
        Class1();

        String^ SayHello(String^ name) {
            return String::Concat(
                ref new String(L"Hello there "),
                name);
        };
    };
}
The code is a bit more complex than your typical Hello, world. The SayHello method takes a string parameter that represents someone’s name. The method concatenates the provided name with a hard coded greeting string and returns the resulting string. Doesn’t get much simpler. However, even though it’s just a single line of code there are several concepts that are important to point out:
- ref class – WinRT objects are projected in C++/CX as ref classes and vise-versa. Since we’re building a WinRT component to consume from C#, we define it as a ref class. Note, unless you’re writing a XAML control, all WinRT classes must be sealed.
- Hats – The ‘^’ character after the String type declarations is the handle-to-object modifier. It’s basically the pointer-to-object modifier (aka ‘*’) but for ref classes. We’ll see in the second part of the demo that you invoke members on a ref class using the same ‘->’ syntax that you use in vanilla C++.
- ref new – You create instances of ref clases using “ref new” instead of “new” as you do in vanilla C++. Ref new returns a handle to the newly created ref class – a String^ in this case.
- PlatformString – C++/CX projects some non-class WinRT types as ref classes in the Platform namespace. In this case, C++/CX projects the new language interoperable string type HSTRING as a PlatformString ref class. HSTRINGS are UTF-16, so PlatformString provides a constructor that takes a wide string literal. We imported the Platform namespace via the “using namespace” directive so we wouldn’t have to type “Platform” multiple times.
For more information about the design of the C++/CX language, check out Jim Springfield’s post on the Visual C++ team blog.
Now that we’ve written our WinRT component, we’ll write the code to consume it in C#. First, we need to add a reference to the C++ WinRT component project in our C# Metro style XAML app. WinRT references are added just like traditional CLR references – via the Add Reference dialog. Right click on the WindowsCamp node of the Solution explorer, select “Add Reference…” from the menu, click the check box next to the WindowsCampComponent project from the solution and press OK.
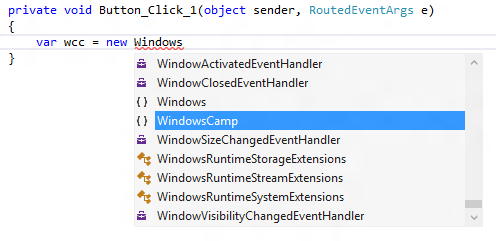
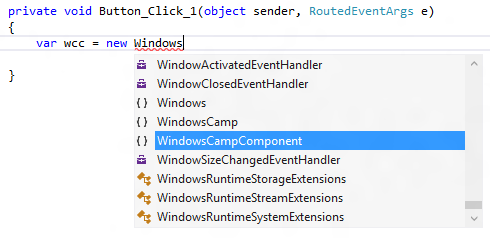
Go back to MainPage.xaml and double click on the button labeled “Click Me” in the designer. This will add a click event handler named Button_Click_1 and take you to MainPage.xaml.cs so you can write the code for it. Type in “var wcc = new Windows” and look at the resulting intellisense list. Notice that WindowsCampComponent is missing.

This is because the C++ component hasn’t been compiled yet. We need compile the C++ component project in order to generate the Windows metadata file (aka the file with the .winmd extension) that is used to drive intellisense. Delete the line of code you just added and compile the solution. Now type that line of code again, and you’ll notice that the WindowsCampComponent namespace is available.

Now, update the button click event handler to read as follows:
private void Button_Click_1(object sender, RoutedEventArgs e)
{
    var wcc = new WindowsCampComponent.Class1();
    myText.Text = wcc.SayHello("Herb Sutter");
}

Now, run the app, click the “Click Me” button and marvel at the wonder of WinRT language interop to print a greeting to Herb Sutter. I used Herb Sutter from the C++ team since he was the keynote speaker at the Windows Camp event and was standing in the back of the room when I did the demo.
And that’s it for the Hello, world demo. Kind of a lot of steps for essentially 3 lines of code – 1 line of component code and 2 lines of client code. However, we did get the infrastructure set up so we add more substantial code in the next post.
Comments: